
Sophisticated photo management no longer requires handing over a personal digital history to a provider with financial incentives to scan it. As digital footprints expand and the reliance on centralized cloud services grows, many users are seeking alternatives that prioritize data sovereignty without sacrificing the advanced features of modern image libraries. In 2026, the technology to host a private photo server has matured to the point where an individual can run enterprise-grade facial recognition and object detection on a standard consumer laptop or desktop. This shift represents a broader movement toward decentralization, where personal data remains physically within the owner’s premises rather than residing on remote servers subject to shifting corporate policies and subscription models. By moving away from centralized platforms, users gain unprecedented control over their digital legacy, ensuring that their memories are preserved in high fidelity without the threat of account deactivation or privacy erosion.
The transition to a self-hosted platform like Immich is driven by the desire for a seamless user experience that mirrors the functionality of industry leaders like Google Photos or Apple iCloud. These cloud-based services have long dominated the market due to their ability to automatically organize images, recognize family members, and provide instant search capabilities across thousands of files. However, the underlying cost of these conveniences often includes the harvesting of metadata and the training of proprietary artificial intelligence models using private imagery. Modern self-hosted solutions now utilize open-source machine learning models that run locally, providing the same level of sophisticated organization while keeping every bit of data behind a personal firewall. This approach not only enhances privacy but also provides a more resilient infrastructure for long-term storage, as it removes the dependency on third-party internet connections and service availability for basic access to one’s own media.
1. Defining the Modern Self-Hosted Photo Management Landscape
Immich stands at the forefront of the self-hosted movement, designed specifically to act as a direct replacement for the most popular cloud photo services. It is an open-source platform that combines a high-performance backend with a user-friendly web interface and robust mobile applications for both Android and iOS. The system is built to handle massive libraries containing hundreds of thousands of items, utilizing a modern tech stack that includes specialized databases for high-speed indexing and vector search. By running this software on local hardware, a user transforms a standard computer into a powerful private cloud. The software handles everything from background uploads to complex metadata extraction, ensuring that the transition from a traditional cloud provider feels familiar and efficient. The platform is continuously updated by a global community of developers, ensuring that it remains compatible with the latest image formats and mobile operating systems.
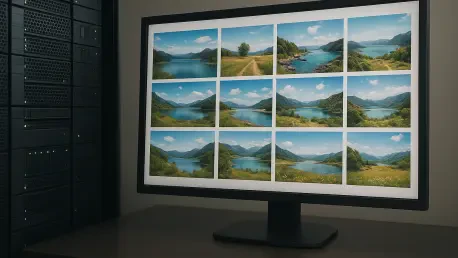
The core functionality of this private server environment revolves around its ability to replicate the “smart” features that users have come to expect from premium cloud services. Upon importing a library, the system automatically triggers a series of background jobs that utilize machine learning to analyze the content of each image. This includes facial recognition, which identifies recurring individuals and groups them into searchable profiles, and object detection, which allows for natural language searches such as “mountain,” “birthday cake,” or “beach.” Furthermore, the platform offers an “On This Day” feature and a chronological timeline that makes navigating years of history intuitive. Unlike cloud providers that may compress images to save space, a private server allows for the storage of original, full-resolution files and even professional RAW formats, providing a superior experience for photography enthusiasts who refuse to compromise on image quality.
In addition to individual use, these self-hosted platforms are built with multi-user support at their core. This allows a single server to act as a centralized hub for an entire household or organization, where each member has a private account and their own secure library. While the data is stored on the same physical hardware, the software maintains strict isolation between users, ensuring privacy while still allowing for the creation of shared albums and collaborative libraries. This collaborative aspect is particularly beneficial for families who wish to consolidate their collective history into one searchable archive without paying for multiple cloud storage subscriptions. The ability to manage permissions and access levels locally provides a level of flexibility that is rarely found in commercial cloud products, making it a versatile tool for both personal and professional media management.
2. Step 1: Installing a Container Manager on Modern Systems
The foundation of a successful self-hosted server lies in the use of containerization, a technology that allows software to run in an isolated environment with all its necessary dependencies. To begin the setup process, a user must first install a container manager, which acts as the engine for running the server’s various components. On a Mac, the most common choice is Docker Desktop, a comprehensive suite that provides a graphical interface for managing containers and virtual networks. However, for those seeking a more streamlined and resource-efficient experience, alternatives like OrbStack have gained popularity. These tools allow the host machine to run Linux-based software seamlessly, ensuring that the server remains stable and responsive even when the computer is being used for other tasks. The installation of a container manager is a straightforward process that involves downloading the installer and granting the necessary system permissions to manage network traffic and disk access.
Once the container manager is active, it creates a virtualized environment where the photo server can operate without interfering with the host computer’s primary operating system. This isolation is critical for security and stability, as it prevents potential software conflicts and ensures that the server can be easily moved or backed up. For users on Windows, the process is similar, often utilizing the Windows Subsystem for Linux (WSL) to provide the necessary kernel features for high-performance container operations. The container manager serves as the orchestrator for the database, the machine learning engine, and the web interface, allowing them to communicate with each other through a secure internal network. This architecture ensures that even if one component encounters an error, it can be restarted independently without taking down the entire photo library, providing a level of reliability that matches professional data centers.
Choosing the right container manager also involves considering the specific hardware architecture of the host machine. In 2026, many users are deploying these systems on ARM-based hardware, such as Apple’s M-series chips or high-efficiency processors in modern laptops. Leading container managers have optimized their engines to leverage these architectures, providing near-native performance while minimizing power consumption. This efficiency is vital for a machine that is expected to remain operational for long periods to facilitate mobile backups and background processing. By selecting a manager that supports hardware acceleration and efficient memory management, the user ensures that the server does not become a bottleneck for the computer’s overall performance. This initial step sets the stage for a professional-grade deployment that is both scalable and easy to maintain over the lifespan of the hardware.
3. Step 2: Obtaining Configuration Files From Official Repositories
After the container manager is functional, the next phase of deployment involves acquiring the specific instructions that define how the photo server should be built. This is accomplished by obtaining the configuration files, specifically the docker-compose.yml and .env files, from the official Immich GitHub repository. These files are written in a human-readable format known as YAML and act as a blueprint for the entire system. The docker-compose.yml file lists every service required for the server to function—such as the PostgreSQL database for metadata and the Redis instance for job queuing—and specifies how they should interact. By using these standardized files, the user ensures that their local installation is identical to the tested and verified versions used by thousands of other people worldwide, significantly reducing the likelihood of configuration errors.
The accompanying .env file is equally important, as it contains the environment variables that customize the server for a specific user’s needs. This file is where the user defines sensitive information, such as database passwords and secret keys, as well as operational parameters like the time zone and specific machine learning settings. Accessing these files typically involves using a terminal or a version control tool like Git to clone the repository or simply downloading the files directly from the web interface. Because these files are versioned and maintained by the developer community, they include comments and documentation that explain the purpose of each setting. This transparency is a hallmark of open-source software, allowing the user to see exactly how their data is being handled and which services are being utilized to process their private photo collection.
Maintaining a clean and organized directory for these configuration files is a best practice that facilitates easier updates and troubleshooting in the future. It is recommended to create a dedicated folder on the system, often named “immich-app” or similar, to house the configuration files and any associated scripts. This directory becomes the “brain” of the server operation; from here, the user can stop, start, or update the entire stack with a single command. By keeping these files separate from the actual image storage, the user ensures that the logic of the application remains portable. If the hardware needs to be upgraded or the operating system reinstalled, simply moving this folder to a new machine allows the entire server to be resurrected in minutes with all settings and metadata intact, demonstrating the inherent flexibility of the containerized approach.
4. Step 3: Designating a Storage Path and Directory Structure
One of the most critical decisions in setting up a private photo server is determining where the actual image and video files will reside. This is managed by editing the .env file to point to a specific storage path on the host machine. For many users, the internal solid-state drive (SSD) of a laptop or desktop provides the fastest access speeds, making it ideal for the database and the active library. However, as photo collections grow to encompass terabytes of data, many opt to point the storage path toward an external hard drive or a network-attached storage (NAS) device. The flexibility to choose the storage medium is a major advantage over cloud services, as it allows the user to scale their capacity simply by plugging in a larger drive rather than paying for a higher-tier monthly subscription.
When designating the storage path, the user must ensure that the container manager has the appropriate permissions to read and write to that specific directory. In the .env file, the UPLOAD_LOCATION variable is updated to reflect the absolute path of the chosen folder. It is also important to consider the underlying file system of the storage device; modern formats like APFS on Mac or NTFS/ReFS on Windows are well-supported, but ensuring the drive is formatted correctly for long-term stability is essential. The directory structure within this path is managed automatically by the server software, which organizes incoming uploads into a logical hierarchy based on dates or user IDs. This organization ensures that even if the server software were to be removed, the photos remain accessible as standard files that can be viewed by any traditional image viewer or operating system.
Beyond simple storage, the designated path must also account for the metadata and machine learning caches that the system generates. As the server processes thousands of images, it creates thumbnails, video transcodes, and facial recognition embeddings, all of which require additional disk space. Setting up the storage path on a high-speed drive is beneficial for these operations, as it allows the web interface to load previews almost instantaneously. If the user chooses to use an external drive, they must ensure a reliable connection, such as USB-C or Thunderbolt, to prevent the server from losing access to the library during a sync operation. By carefully planning the storage architecture at the outset, the user creates a scalable foundation that can accommodate a lifetime of digital memories without the performance degradation often associated with large-scale cloud synchronization.
5. Step 4: Launching the Software Environment via Command Line
With the configuration files in place and the storage path defined, the user is ready to bring the private photo server to life. This is accomplished by opening a terminal or command prompt, navigating to the directory containing the configuration files, and executing the command docker compose up -d. This single instruction triggers a complex chain of events: the container manager reads the blueprint files, pulls the necessary software images from a secure registry, and starts each service in the correct order. The “-d” flag, standing for “detached mode,” allows the server to run in the background, freeing up the terminal for other tasks while the server remains active. This process effectively turns the computer into a functioning web server, accessible through a browser at a specific local address, typically https://localhost:2283.
During the initial launch, the system performs several automated setup tasks, such as initializing the database schema and starting the machine learning worker nodes. The user can monitor this progress through the container manager’s logs, which provide real-time feedback on the health of each service. If any issues arise, such as a port conflict or a permission error, the logs offer detailed diagnostic information that can be used for troubleshooting. This stage of the process highlights the power of modern software orchestration; what once required hours of manual configuration and dependency management is now condensed into a few seconds of automated execution. Once the services are reported as “healthy,” the administrative interface becomes available, allowing the user to create their primary account and begin the onboarding process.
The administrative web interface is where the final server-side configurations take place. Here, the user can set up automated jobs for facial recognition, define which machine learning models to use for object detection, and manage user accounts. It is also the primary portal for uploading existing photo libraries from a computer’s hard drive. The interface is designed to be responsive and intuitive, providing a dashboard that shows the current status of the library, including the number of photos processed and the storage space remaining. This transition from the command line to a polished web interface completes the transformation of the local machine into a professional media hub. The server is now ready to accept connections from mobile devices, bridging the gap between local storage and mobile accessibility.
6. Step 5: Configuring the Mobile Application for Remote Syncing
The true power of a Google Photos replacement is realized through its mobile integration, allowing for the automatic backup of photos as they are captured. To finalize the setup, the user downloads the Immich mobile application on their smartphone and connects it to the newly created private server. Instead of providing a cloud-based email and password, the user enters the local IP address of their computer (for example, https://192.168.1.50:2283). This direct connection ensures that the photos are transmitted over the local Wi-Fi network directly to the home server, bypassing the public internet entirely. This method is not only significantly faster than traditional cloud uploads but also ensures that the high-resolution data remains within the private network throughout the entire transfer process.
Configuring the mobile app involves setting specific sync parameters to match the user’s lifestyle and data needs. The application offers options to back up only when the device is charging or only when it is connected to an unmetered Wi-Fi network, preventing unnecessary battery drain or cellular data usage. Users can also select specific folders to monitor, such as the camera roll, screenshots, or images from messaging apps. Once the initial handshake is established, the app begins scanning the phone’s gallery and uploading any new items to the server. The mobile interface provides a seamless browsing experience, pulling thumbnails from the home server and allowing the user to search their entire library using the same powerful tools available on the web version.
For access when away from home, more advanced users can configure a secure remote connection, such as a Virtual Private Network (VPN) or a reverse proxy with encryption. This allows the mobile app to sync new photos even when the user is traveling, maintaining the “always-on” convenience of commercial cloud services while preserving the security of a private server. In 2026, many home routers and software tools have made setting up these secure tunnels much simpler, often involving a one-click configuration. By establishing this remote link, the user ensures that their digital archive is updated in real-time, regardless of their physical location. This completes the ecosystem, providing a robust, private, and highly capable alternative to the centralized cloud model that dominated previous decades.
7. Performance Benchmarks: Analyzing Mac and PC Hardware Environments
The experience of running a private photo server can vary significantly based on the hardware environment, particularly when comparing traditional PCs with modern Mac systems. On a high-performance PC equipped with a dedicated Nvidia graphics card, the server can leverage CUDA-based hardware acceleration. This technology allows the machine learning models responsible for facial recognition and object detection to offload their heavy computational work to the GPU, resulting in incredibly fast processing speeds. When importing a legacy library of 50,000 photos, a GPU-accelerated PC can index and tag the entire collection in a fraction of the time it would take using only a central processor. This makes the PC an excellent choice for users with massive archives who require rapid initial processing and frequent re-indexing of high-resolution media.
In contrast, modern Macs, particularly those utilizing Apple Silicon (M1 through M4 chips), offer a different set of advantages centered on efficiency and unified memory. While Docker on macOS currently lacks the deep GPU passthrough capabilities found in Linux-based PC setups, the M-series chips are exceptionally capable at handling AI-related tasks through their high-efficiency CPU cores and dedicated Neural Engines. For a personal library, a MacBook Pro can process images with remarkable speed while consuming very little power and remaining virtually silent. The unified memory architecture of these chips allows the server to move data between the processor and memory with minimal latency, ensuring that the web interface and search functions feel snappy and responsive. For most users, the performance on a modern Mac is more than sufficient, providing a professional-grade experience without the need for a bulky desktop tower.
The choice between these environments often comes down to the user’s existing hardware and their specific priorities regarding speed versus portability. A PC running a dedicated Linux distribution remains the “gold standard” for self-hosting enthusiasts, as it offers the most direct access to hardware resources and the greatest flexibility in terms of internal storage expansion. However, the MacBook Pro’s ability to act as both a primary workstation and a photo server is highly appealing for users who prefer a minimalist setup. Regardless of the platform, the underlying software is optimized to utilize available resources effectively. In 2026, the performance gap between these systems has narrowed to the point where the user experience remains high-quality on either side of the ecosystem, provided the machine has sufficient RAM and a modern processor to handle the containerized workload.
8. Financial Autonomy: Eliminating Recurring Subscription Fees
One of the most compelling arguments for replacing a cloud service with a private server is the immediate and long-term financial benefit. As cloud providers have moved toward aggressive monetization, the cost of storing a lifetime of photos has become a perpetual monthly burden. A typical 2TB cloud storage plan can cost over a hundred dollars annually, a price that is subject to increase as the provider adjusts its tiers or removes free storage options. By hosting their own server, a user shifts this financial model from an ongoing expense to a one-time capital investment. The cost of a high-capacity 8TB or 12TB hard drive is often equivalent to just one or two years of a premium cloud subscription, yet it provides significantly more storage space and remains a physical asset owned by the user.
The financial autonomy gained through self-hosting extends beyond the cost of the storage itself. Cloud services often lock users into an ecosystem where they must pay for additional features, such as advanced search, AI-powered editing, or family sharing. With a platform like Immich, these features are included as part of the open-source package, with no hidden fees or tier-based restrictions. This allows a family to manage their collective media history for the cost of a single set of hardware, rather than paying for multiple individual cloud accounts. Over the course of a decade, the savings realized by avoiding these subscriptions can amount to thousands of dollars, making the initial effort of setting up a private server a highly rational economic decision.
Furthermore, the self-hosted model protects the user from the “storage creep” that often forces cloud customers into more expensive tiers. Because modern cameras and smartphones capture increasingly high-resolution images and 4K or 8K video, a cloud library that once seemed spacious can quickly become full. When this happens on a private server, the user simply adds a new drive or replaces an old one with a larger capacity, maintaining control over the cost and timing of the upgrade. This level of financial predictability is a stark contrast to the cloud market, where users are often forced to choose between deleting precious memories or paying a higher monthly rate. By owning the infrastructure, the user ensures that their digital archive can grow as large as their life requires without an escalating financial penalty.
9. Data Privacy: Local Processing and Neural Networking Protocols
The core philosophy of a private photo server is the total protection of user data through local processing. In the traditional cloud model, when an image is uploaded, it is often analyzed by the provider’s algorithms to identify faces, locations, and objects. This metadata is then stored in the provider’s database, where it can be used for profiling, targeted advertising, or other purposes that the user may not fully understand or consent to. In 2026, the importance of data sovereignty has become a major societal concern, leading to a surge in tools that perform these same AI tasks locally. By running machine learning models within a private server, the user ensures that their children’s faces, their home’s location, and their personal habits are never transmitted to or stored on a corporate server.
The neural networking protocols used in self-hosted solutions are based on open-source models that have been optimized for privacy and efficiency. These models, such as those used for CLIP (Contrastive Language-Image Pre-training) and advanced facial recognition, are downloaded once to the local machine and never need to connect to the internet to function. When a new photo is added to the library, the local server performs the analysis entirely within its own memory. This means that even the most sensitive information—such as photos of private documents, medical records, or intimate family moments—remains completely isolated from the public web. This “privacy-by-design” approach provides a level of security that no cloud provider can truthfully match, as it removes the provider from the equation entirely.
This commitment to privacy also extends to how the software handles external connections and updates. Modern self-hosted platforms are designed to be “air-gapped” if necessary, meaning they can function perfectly without an internet connection once the initial setup is complete. For those who do want remote access, the use of encrypted tunnels and private keys ensures that only authorized devices can communicate with the server. This is a significant departure from the centralized model, where a single security breach at a major tech company could potentially expose the private photos of millions of users. By decentralizing storage and processing, the individual reduces their “attack surface” and takes personal responsibility for their digital boundaries, turning their home server into a secure fortress for their digital legacy.
10. System Reliability: Navigating Maintenance and Redundancy Needs
Transitioning to a private photo server brings many benefits, but it also places the responsibility for system reliability and data integrity squarely on the shoulders of the user. Unlike a cloud provider that manages massive server farms with professional administrators and redundant power supplies, a home server is subject to the limitations of personal hardware and household infrastructure. To ensure the long-term safety of a photo library, a user must implement a robust maintenance and backup strategy. This includes regular software updates for the container manager and the server software, which often include critical security patches and performance improvements. While these updates are usually automated or involve a simple command-line trigger, they require the user to remain engaged with the health of their system.
Redundancy is perhaps the most important aspect of maintaining a self-hosted library, as hard drives are mechanical or electronic devices that will eventually fail. A professional-grade self-hosted setup should ideally include a “3-2-1” backup strategy: three copies of the data, stored on two different types of media, with one copy located off-site. For many, this means the primary server library is mirrored to a second internal or external drive (often using RAID or simple scheduled synchronization), while an encrypted archive is periodically uploaded to a cold-storage cloud provider or a physical drive kept at a different location. This setup ensures that even in the event of a catastrophic hardware failure, a fire, or a theft, the user’s digital history remains intact and recoverable.
Furthermore, the user must account for environmental factors that can affect server uptime, such as power outages or hardware overheating. Utilizing an Uninterruptible Power Supply (UPS) is a common recommendation for home servers, as it provides a battery backup that allows the machine to shut down gracefully during a blackout, preventing database corruption. Additionally, ensuring proper ventilation for the host machine is vital, especially when it is performing intensive machine learning tasks that generate significant heat. While these considerations may seem daunting to a novice, they are part of the natural progression toward digital self-sufficiency. By treating their photo server as a critical piece of personal infrastructure, the user develops a deeper understanding of how their data is stored and protected, leading to a more resilient and reliable archive.
11. Infrastructure Management: Ensuring Persistent Network Access
Maintaining consistent access to a private photo server requires a stable and well-configured network environment, especially when relying on a laptop like a MacBook Pro. One of the primary challenges with using a laptop as a server is its inherent design to save power by entering a sleep state when idle or when the lid is closed. If the computer sleeps, the Docker containers pause, and the mobile application will be unable to back up photos or search the library. To prevent this, users must modify their system’s energy settings to allow for “wake-on-network” activity or use utilities that prevent the system from entering a deep sleep while the server is active. This ensures that the server remains “always-on” and ready to receive data from family members’ devices at any hour of the day.
Networking also involves ensuring that the server has a consistent address within the home network so that mobile devices can always find it. By default, most home routers assign IP addresses dynamically, which means the server’s address could change if the router restarts. To solve this, users should configure a “static IP” or a “DHCP reservation” within their router settings, pinning the server to a specific address like 192.168.1.50. This small but crucial step ensures that the mobile app never loses its connection to the library. For users who want a more polished experience, setting up a local DNS entry allows them to access the server using a friendly name, such as https://photos.home, making the system feel like a professional integrated service rather than a series of IP addresses.
Finally, managing the bandwidth of the home network is essential to ensure that photo backups do not interfere with other activities like video conferencing or gaming. Modern photo server software allows for “throttling” or scheduling of intensive tasks, ensuring that the heavy lifting of indexing and transcoding happens during off-peak hours. Additionally, for those who set up remote access, monitoring the upload speed of their internet connection is important, as slow upload speeds can make remote browsing feel sluggish. By optimizing the local network infrastructure, the user creates a seamless bridge between their physical hardware and their digital life. This focus on network stability transforms a collection of software containers into a reliable, high-performance utility that serves the entire household without friction.
12. Strategic Roadmap: Securing a Permanent Digital Legacy
The transition from a centralized cloud provider to a private server represented a fundamental change in how digital history was preserved. By implementing a self-hosted solution, users successfully reclaimed their privacy and eliminated the recurring financial drain of subscription models. The process required an initial investment in learning and hardware, but the result was a highly sophisticated system that offered the same AI-powered features as the leading tech giants while maintaining total data sovereignty. This journey into self-hosting proved that individuals could manage their own infrastructure effectively, provided they remained committed to the principles of maintenance and redundancy. The final setup became more than just a place to store images; it became a secure, permanent archive that lived and breathed on the owner’s terms.
In the end, the move to a private server became a standard practice for those who valued the integrity of their personal data over the convenience of a corporate account. The use of containerization and open-source software provided a level of flexibility and portability that was previously unimaginable for the average consumer. As hardware continued to evolve, the ability to run complex machine learning models at home became even more accessible, further cementing the private server as the ultimate tool for digital preservation. The shift was not just about technology; it was about the peace of mind that came from knowing that a lifetime of memories was safe, private, and entirely under one’s own control. This evolution in photo management set a precedent for other digital services, leading to a future where ownership and privacy were once again the cornerstones of the personal internet.